Draft of Lesson 3: From web page to web site!

Update: live-taping concluded!

I’m off to the editing bay! You can expect the video soon!


Introduction

Howdy, y’all! Joe Hills here, recording as I always do in Nashville, Tennessee, and in today’s lesson we’re going to learn how to go from a bad web page to a simple web site. 

Everything we’re doing today builds directly on our previous two lessons. In lesson one, we created a single-file bad web page, and in lesson two, we learned how to copy that web page to your web host’s server in its web root directory.

What is a web site?

If you wanted to, you could just code a bunch of individual and unique bad web pages, upload them to your web host’s server, and then send folks links to each page directly via social media or e-mail… but a bunch of web pages isn’t a web site in the same way that several plastic bags of meats and cheeses isn’t a charcuterie board, or several vertebrates with polyhedral dice isn’t a D&D group.

A web site has a couple aspects that unify its individual pages into a single experience for a visitor:

  1. First, a logical information structure
  2. Second, consistent visual design

Wow, both of these sound equally fun, so I’m just going to work my way down the list, starting with logical information structure, woo!

Logical information structure

I hope you brought your cartography tools, because we’re about to sketch out a site map! 

The index.html page we created last lesson will serve as our home page, and will welcome visitors to your site and direct them toward the other information you’d like to share. 

What kind of information would you like to share? Only you know the desires of your heart, but I will share with you those of my own! 

I’d love to have a web site where I feature different projects as I work on them!

So, I have a couple projects I’m working on right now, a thatched-roof hut that sells potatoes, and an art deco TV studio. I also want my website to include a quick bio about me in case visitors who read about my thatched-roof hut want to learn more about me. 

So that brings our site map to four pages including the home page. The fastest way to create a page for each of these concepts is to copy my index.html file three times. I’ll name the first one as potato.html, the second one as tv.html, and the third ones as bio.html.

If we open each page, we can update the text in the <title> tags, the headings in the <h> tags, and the body text in the <p> tags to reflect our beautiful imaginings we’d like to gift to the world!

Navigation

Now that we have four pages, we need to create a list of links that will point to each page, and add that list to all four pages. Since all of the pages are on the same domain name, we can use urls that are “relational” and start each one with a slash rather than the full domain name.

So, between our page’s heading and our body text, we’ll add that list of links here, and then we’ll upload all four pages.

Okay, so now we have a logical information structure with four pages and they already all have the same visual design, so you’re probably wondering, why do we need a separate heading for…

 Consistent visual design

Right now, we have one web site, with four separate files for four separate pages. Intuitively, you might think this is the optimal number of files for a four-page website, but as soon as we make a style change to one, say turning the headings a more readable color, or turning the body text a more readable color, or adding margins on either side of the body text, we’ll have to make those same changes four times!

Stylesheets

That might not sound like a lot now, but what if I want to add more pages for more projects over time, or additional biographies of myself, because if George Washington can have dozens, maybe I can have at least two as a treat? So, we could have a dozen pages, or dozens of pages, and we want to create one file that stores the style code for all of those pages.

To do that, we’re going to create a new folder, called styles, and then take the style code from the top of our homepage, create a new type of file called a stylesheet, name it “style.css” and upload it in that folder.

Then, we’ll remove the code in the <style> tags at the top of our four pages and replace it with a linked reference to our stylesheet using the <link> tags. We’ll indicate using the rel attribute that the relationship between our page and the linked file is that of a majestic stylesheet, and we’ll use the href attribute to set the path and filename to “/styles/style.css” and wowed-woo, we have saved our future selves a ton of work.

We can apply this methodology to fonts and images we want to host as well. 

Fonts

The Alphabet subsidiary Google has a bunch of fonts on their servers you can link directly, and smaller font companies like Nate Piekos’s one-man foundry Blambot will sell you fonts you can self-host in a fonts directory comparable to the styles directory we created earlier. Anyone who sells fonts will give you specific instructions about how to use them, but it’s really all the same as linking a stylesheet: your web page will tell the browser to pull in an external resource to make the page display the way you’d like.

Images

When it comes to images, you’ll probably want to host quite a few of these, so, creating an images folder to host them all in is generally advisable. I’m not your boss, you can put them all in the web root directory for all the browsers care, but making this one extra directory now may serve to make your life easier three years from now when your site is thriving after dozens and dozens of updates and expansions.

Okay, so let’s say we want to add images to our pages, we’ll use the <img> tag for that. There’s a whole slew of attributes available for every tag, and <img> is no exception, but the ones we care most about right now are the src attribute, which provides visitors browsers with the URL it can find the image at, the alt attribute which describes the image for screen readers, and the height and width attributes, which we can safely set to “auto” and “100%” until we know better, which is a rabbit hole wildly out of scope for today. Almost every attribute of every html tag could be its own video, and with good reason, but we’re on a bit of a focused path toward self-publishing a website here.

So, here’s a photo of me I can add to my biography page. We’ll upload it here and add relevant attributes to our <img> tag like so…

TODO add screenshots and code.

And wow, we have gone from a single web page to an entire web site!

Outroduction

For some people whose sites only need a few pages and won’t be updating regularly, this is all you need, but for folks who want a blog or to update regularly, you’ll wanna return for Lesson Four, in which we’ll cover content management systems like WordPress and whether you should make that jump in complexity in return for ease of  updating.

Whether you’re using hand-coded html or WordPress, I recommend you consider our sponsor NameHero for your hosting needs. They do both!

If you need hosting or a domain name, please make your purchase using my affiliate link at: 

https://namehero.com/joe 

Until next time, y’all, this is Joe Hills from Nashville, Tennessee. Keep adventuring!
Draft of Lesson 2: Joe Hills says you can host a web page

Update: taping concluded!

I’m off to the editing bay! You can expect the video soon!


Introduction

Howdy, y’all Joe Hills here, recording as I always do in Nashville, Tennessee, and I’m here today to help you help yourself experience the joy and wonder of self-publishing on the internet! 

In our previous lesson, we worked together to enthusiastically create a bad web page, as that’s the first step to doing anything well—as long as that “anything” is making a web page!

In this lesson, I’ll be teaching you how to self-publish that web page by copying it from your computer to a web server.

What is a web server?

Without getting too technical, a “web server” is basically “someone else’s computer in a data center.”

So, you could think of that someone else’s computer in a data center as someone else’s bulletin board in a coffee shop. If you had a community newsletter you wanted to post, you’d print a copy of what you wrote and pin it to the bulletin board, which people would access by visiting the coffee shop and walking up to it. 

When you upload a copy of your web page’s html file, that’s like pinning a printout to the bulletin board. When visitors type the url or your web page into their web browser, that’s the digital equivalent of them walking up to coffee shop bulletin board to see what’s going on around the neighborhood.

Now if you’re entrepreneurial, you can always buy your own server to put in a data center, just like your could theoretically buy your own coffee shop and your own bulletin board, but we can’t all be Bob Bernstein, so most of us let someone else host the web pages for us. 

What does hosting cost?

Some university students may have access to “free” web hosting through their institution, like my Alma Mater’s my.vanderbilt.edu program, so if you’re a student, check if your school offers to host websites for you. Obviously Vanderbilt students aren’t really getting free hosting, they’re just paying for it out of their $65,000 of annual tuition, but don’t worry! There’s plenty of ways to buy web hosting directly without bundling in a four-year degree from a private university!

For example, our sponsor for this lesson, NameHero, have a few different tiers of hosting they offer, but for the purposes of this lesson I’ll be using the Turbo Cloud tier they provided me to use for this course as part of this sponsorship. 

I’ll walk you through how to pick hosting features later in this video, because the first thing I want to show you is how easy it is to actually upload your bad web page from Lesson 1. 

Publishing: upload your html file from your computer to the server

Your web server has a directory structure that is basically the same as the one on your computer. We call whatever directory is serving the home page for your site the web root directory. In our next episode, we’ll be exploring how to use additional sub directories to host assets like fonts and images for your site, but for today, we just want to identify our web server’s web root directory and upload our bad web page. 

Your web hosting company should provide you with instructions for connecting to your server and uploading files, but the default upload destination isn’t necessarily the public-facing web root directory. In some cases, that directory might be named htdocs, but in this case, it’s called TODO. 

Most entry level web hosts these days have a web-based file manager you can use in addition to old school sftp connections. This is another rabbit-hole warning! While you’re just starting out, you can probably stick to whatever your web host provides. You may have heard from friends who do a lot of web development work about the command-line based OpenSSH sftp client or graphic SFTP clients like Filezilla, but those are likely more than what you need for what we’re attempting today.

So, when we open our web host’s control panel, we can find the file manager here:

TODO screen capture

In my caee, I can see that when we initially connect we’re looking at the TODO directory and that we can access the web root directory by clicking TODO. 

Once we’ve confirmed we’re looking at the public-facing web root directory, we can upload our bad web page file using the file manager’s upload feature like so, and now the page should be live.

Let’s access that page by visiting the domain name I bought from my host followed by the file name. 

So: example.com/badwebpage.html

TODO screenshot

And there it is!

Be careful what you upload to any public-facing web directories, as folks can and will find them! This really is like posting on a public corkboard!

Let’s try something else! You may notice that I instructed you to include the filename after your domain name, and that’s because when we access our domain name or a sub-directory on that domain name without requesting a specific filename, the server tries to serve a default file, which on most web hosting configurations is index.html or index.php.

Let’s create a local copy of our bad web page and name it index.html. Then we can upload that to the same folder, and you should see your bad web page load as the home page for your new site. 

So, now that you’ve seen that this is easy enough anyone can do it, i promised I’d come back around to picking a hosting plan. I’m going to be talking about a few options offered by our sponsor NameHero, but you could apply this analysis to other hosts too as needed. 

Too many choices?

Picking a hosting plan

If you already have a domain name or are comfortable buying one elsewhere and pointing it to your web host, you may be able to just start off with the cheapest entry-level hosting plan here. You can always upgrade later if you want to host more sites? More sites?! What?! Why? I’ll come back to that in a second. 

It does streamline things if you get a plan with a domain name included, like this one, which also allows you to host more than one site. 

Having more than one site available to you can be handy for separating your interests into multiple sites, creating opportunities for your kids to learn to code, but be limited to publishing things through your account, or even just creating experimental test variants of your own website. As I said, you can always upgrade your plan later, but often the introductory pricing offered by web hosts to new customers is a better deal than they offer to existing customers looking to upgrade. If you think you might need an upgraded plan in less than a year, you might save money by signing up for the more expensive plan up front but taking the larger discount. 

Inventing a domain name

So, what about creating your domain name? You know yourself and what you want to share better than I do, so try to think of something that might look good on a printed card or flyer and is easy enough to speak aloud and spell.

If you’re planning any sort of communication about your site with others, I’d recommend considering something that you wouldn’t mind also using in an e-mail address.

For example, because I own JoeHills.net for my website, I can link that domain to an e-mail provider and create name@joehills.net email accounts for myself folks working for me. If you’re making a website for a project you’d like people to contact you about, keep how it would sound in an email address in mind while choosing a domain name. 

Outroduction

Thanks so much for joining me for my second lesson in this series!

In our next lesson, we’ll explore making the jump from simple web page to simple web site!

This lesson was sponsored by NameHero! If you need hosting or a domain name, please consider using my affiliate link at: 

https://namehero.com/joe 

Lesson One: Joe Hills says you can code a bad web page first

A title card with Joe Hills pointing at the words: "Lesson One: Make a Bad Web Page First"

Introduction

Howdy, aspiring web publishers! Joe Hills here, writing as I always do in Nashville, Tennessee, and today I’d like to welcome you to my new series “Joe Hills says you can Code.”

This series welcomes folks with little or no programming experience to the power of creating and publishing your own work on the internet. Future lessons will focus on publishing your first web page, expanding your work into an entire web site, and ways to manage sprawling amounts of work like blog posts—but first I’m going to teach you how to make a bad web page.

A bad web page is a starting point, like an illustrator’s pencil sketch or a sculptor’s rough concepts. We’ll make something to prove we can make it, examine it in light of what we’ve learned, and then ultimately re-create, refine, and replace it with something better.

Aside: What does Joe even know anyway? I’ve been marking up web pages in html and styling them with css for fun since I was in middle school in 1999. I started building websites professionally as a LAMP developer (Linux, Apache, MySQL, PHP) starting in college in late 2006. You can check my LinkedIn profile for more specifics.

The simplest possible bad web page

The simplest possible web page is a text file saved with an .html extension. That’s right, you can just type a bunch of text into Notepad and save it as mybadwebpage.html, and when you double-click on that, it’ll open in a web browser, just like if you’d sent a request to a web server. So, let’s do that.

Step 1: Open a plaintext editor, like Notepad in Windows or bbEdit on MacOS. Rabbit hole warning, professional developers have very strong feelings about why the text editor they use is the best. You could spend weeks just trying to compare and mess around with different options, but sticking with something dead simple is all you need to get started.

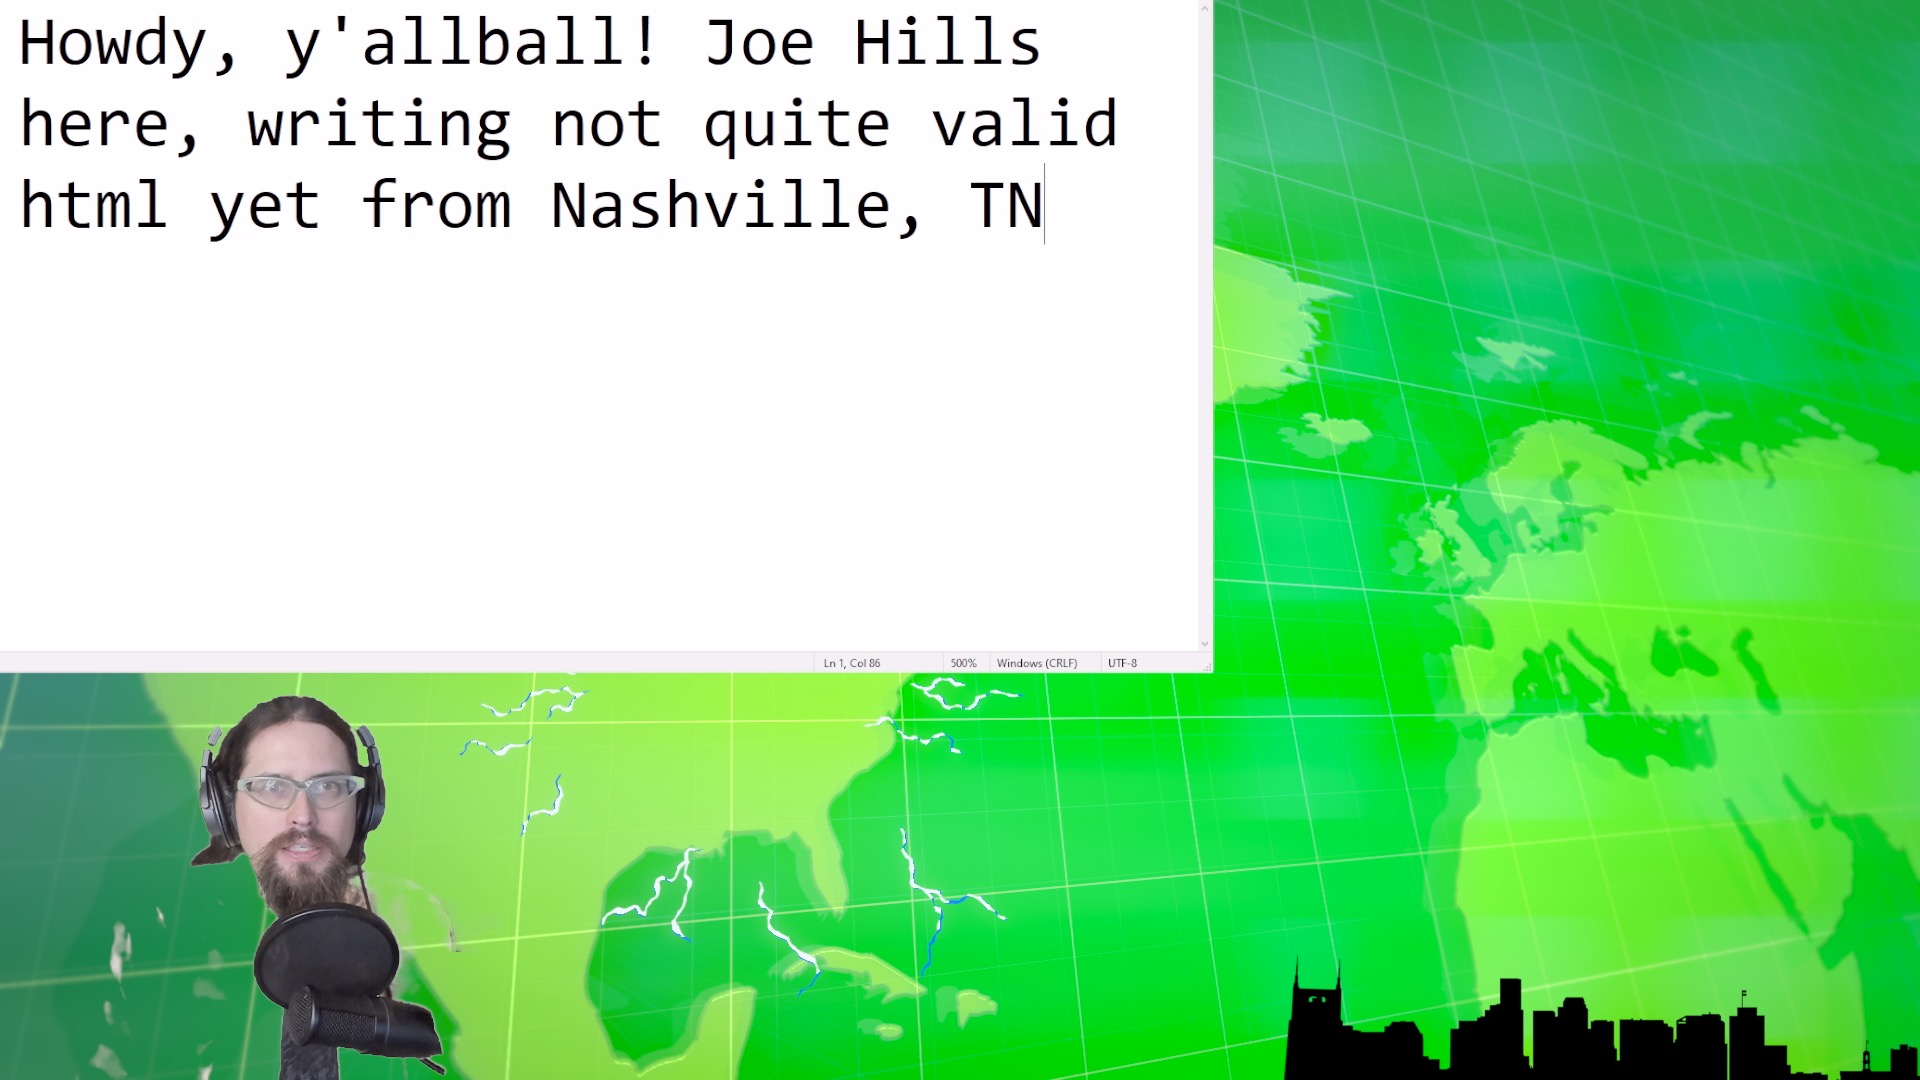
Step 2: Write something in the text editor. The traditional programming example would suggest you write, “Hello, World!”—but I think you should express what’s in your own heart. For my part, I’m writing:

Howdy, y'allball! Joe Hills here, writing not yet entirely valid html from Nashville, TN!

A screenshot of Joe Hills adding his greeting into Notepad.

Step 3: Save the file with a .html extension somewhere you can find it.

Step 4: Find it. If you can’t try step 3 again.

Step 5: Open the file in your web browser.

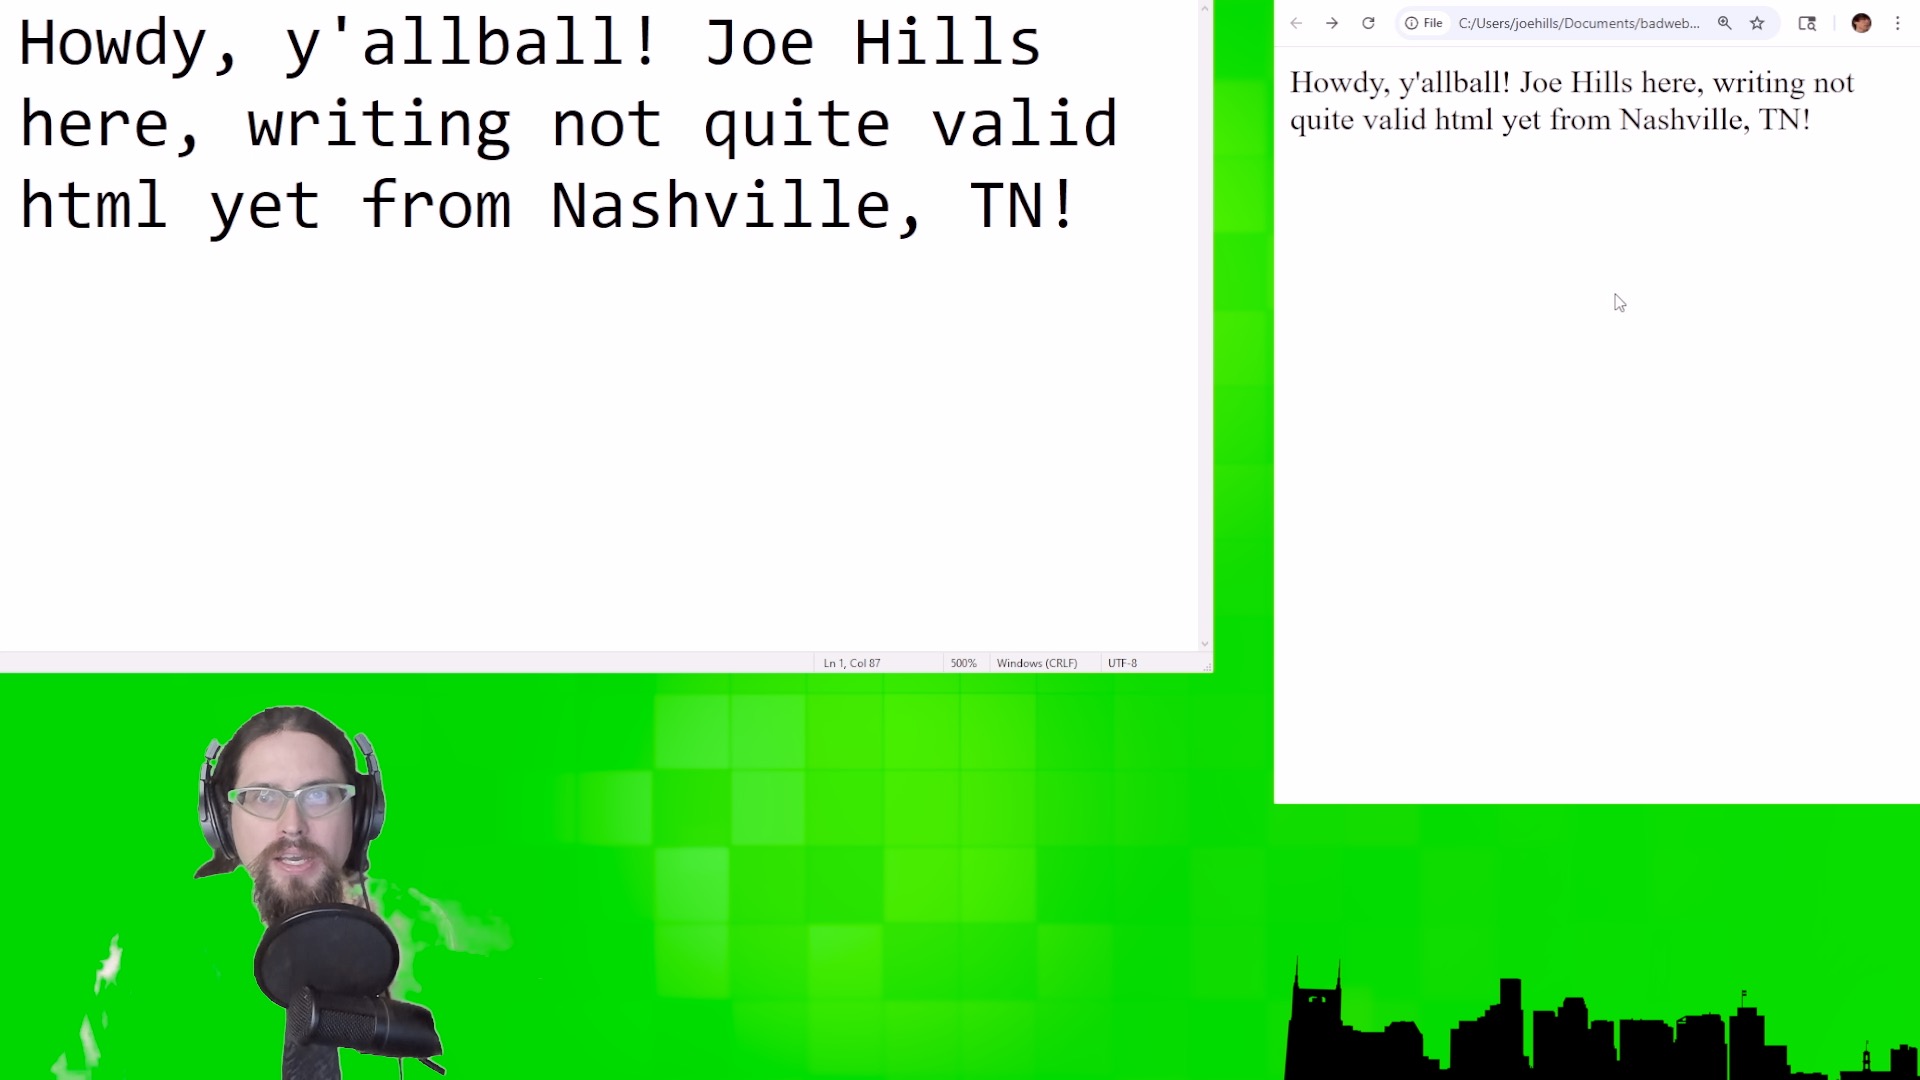
Step 6: Look at that!

A screenshot showing the same greeting in the text editor as in the web browser.

Congratulations, you made a bad web page! If you uploaded that file to a web server right now, someone who accessed it would see exactly what you’re looking at. We’ll get to hosting and self-publishing in Lesson 2, for right now, let’s focus on adding actual html tags to our html file.

Once more, with HTML

Before we start adding html tags, we’ll add an instruction at the top of the file for the web browser to interpret the document as html:

<!DOCTYPE html>

That done, we can start using html tags around text in our file.

If you’ve used markdown or other markup languages, you’re probably loosely familiar with the idea of adding tags around text—but either way, you’ll pick it up fast.

Headings, paragraphs, and lists 

Let’s say we wanted to add a header above the text we wrote earlier. We can insert a new line above that with “Greetings!” and save our file, but when we open it, all the text has run together. That’s because HTML tags are used to separate elements, like headers and paragraphs.

If we add an opening <h1> tag and a closing </h1> tag before and after “Greetings” and an opening <p> tag and a closing </p> tag around our other text, we can save and reload the file in our browser to see our header and our paragraph are now both separate and visually distinct.

Let’s add another header, “Some websites I recommend” You’ll wanna wrap that in <h1> tags as well.
<h1>Some websites I recommend</h1>
In addition to paragraphs and headings, one of the most common ways to structure text in html is as a list. There’s a few kinds of lists, but the simplest is the unordered list, which opens with a <ul> tag and closes with a </ul> tag. Each list item inside a list opens with an <li> tag and closes with a </li> tag.

For my list, I’m going to list three websites hosted by folks that I appreciate.

<ul>
<li>gamersoutreach.org</li>
<li>wikipedia.org</li>
<li>lovetropics.org</li>
</ul>

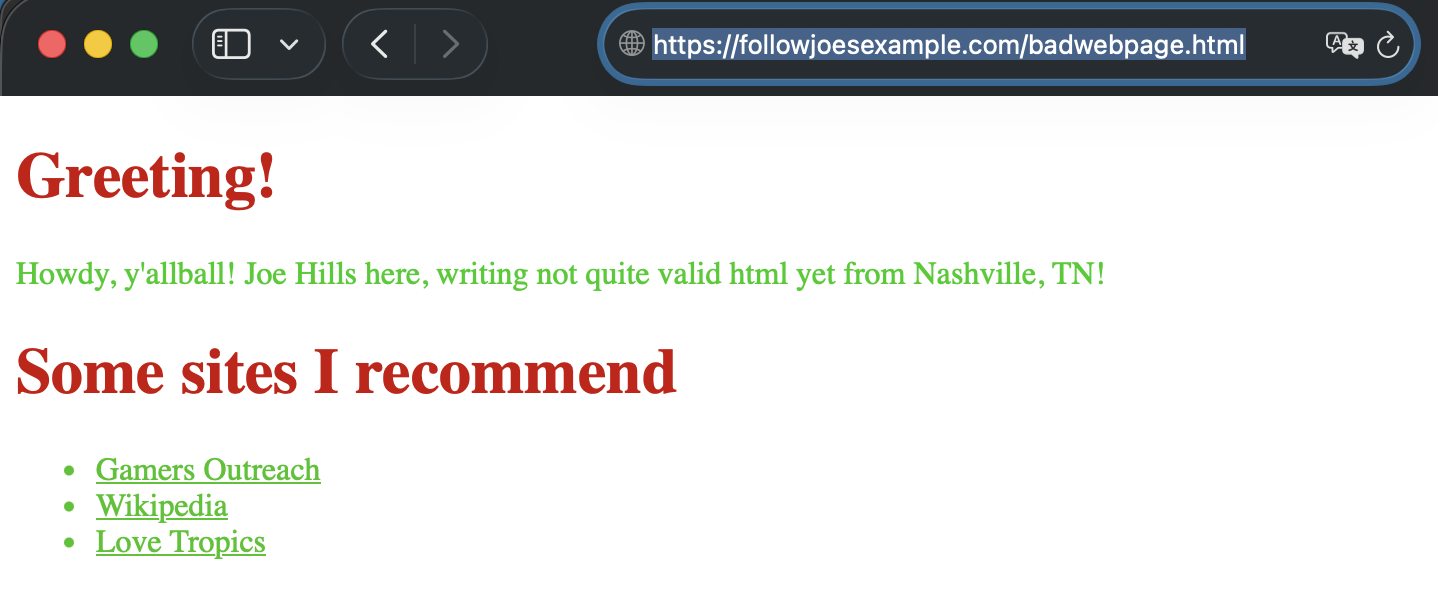
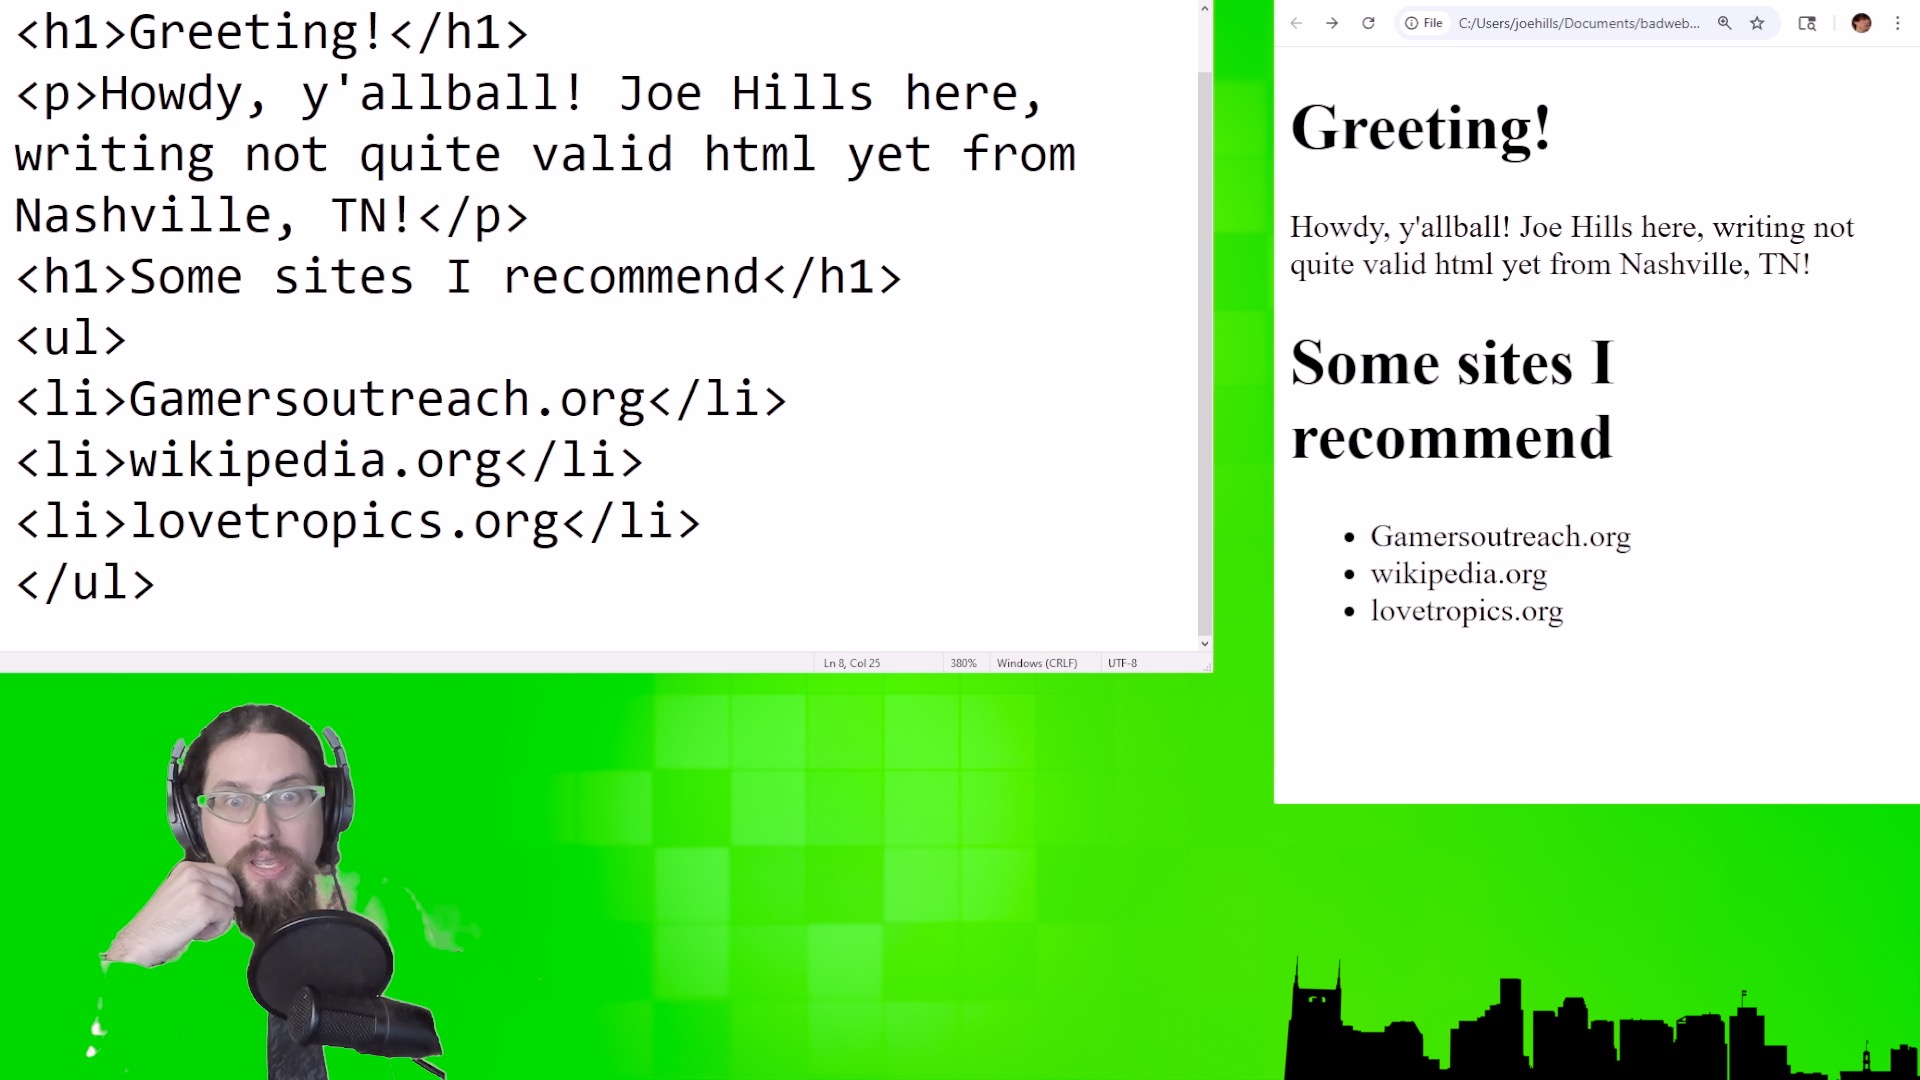
If you create a list like that, save it, and reload your html file, you should see something like this:

A screenshot showing how the code renders a list.=

That’s progress, but I bet you’d like those websites to be clickable links? Good news, the HT in HTML is HyperText, which is the original term for links. Side note, the ML is Markup Language, which is why we’re using it to mark up a bunch of text with links.

The anchor tag, which opens with <a> and closes with </a>, can be added around the name of your website to turn that text into a clickable link. To actually tell the browser where to go, you’ll need to add something extra inside the opening <a> tag, a bit of info called an attribute. By setting the text in the href=”” attribute to the precise URL I’d like to point at, I don’t have to clutter the visible portion of my website.

For example, I can set the Love Tropics href=”” attribute to link readers directly to their about page, “https://lovetropics.org/about” while the visible text reads cleanly “Love Tropics.”

Once more with validating

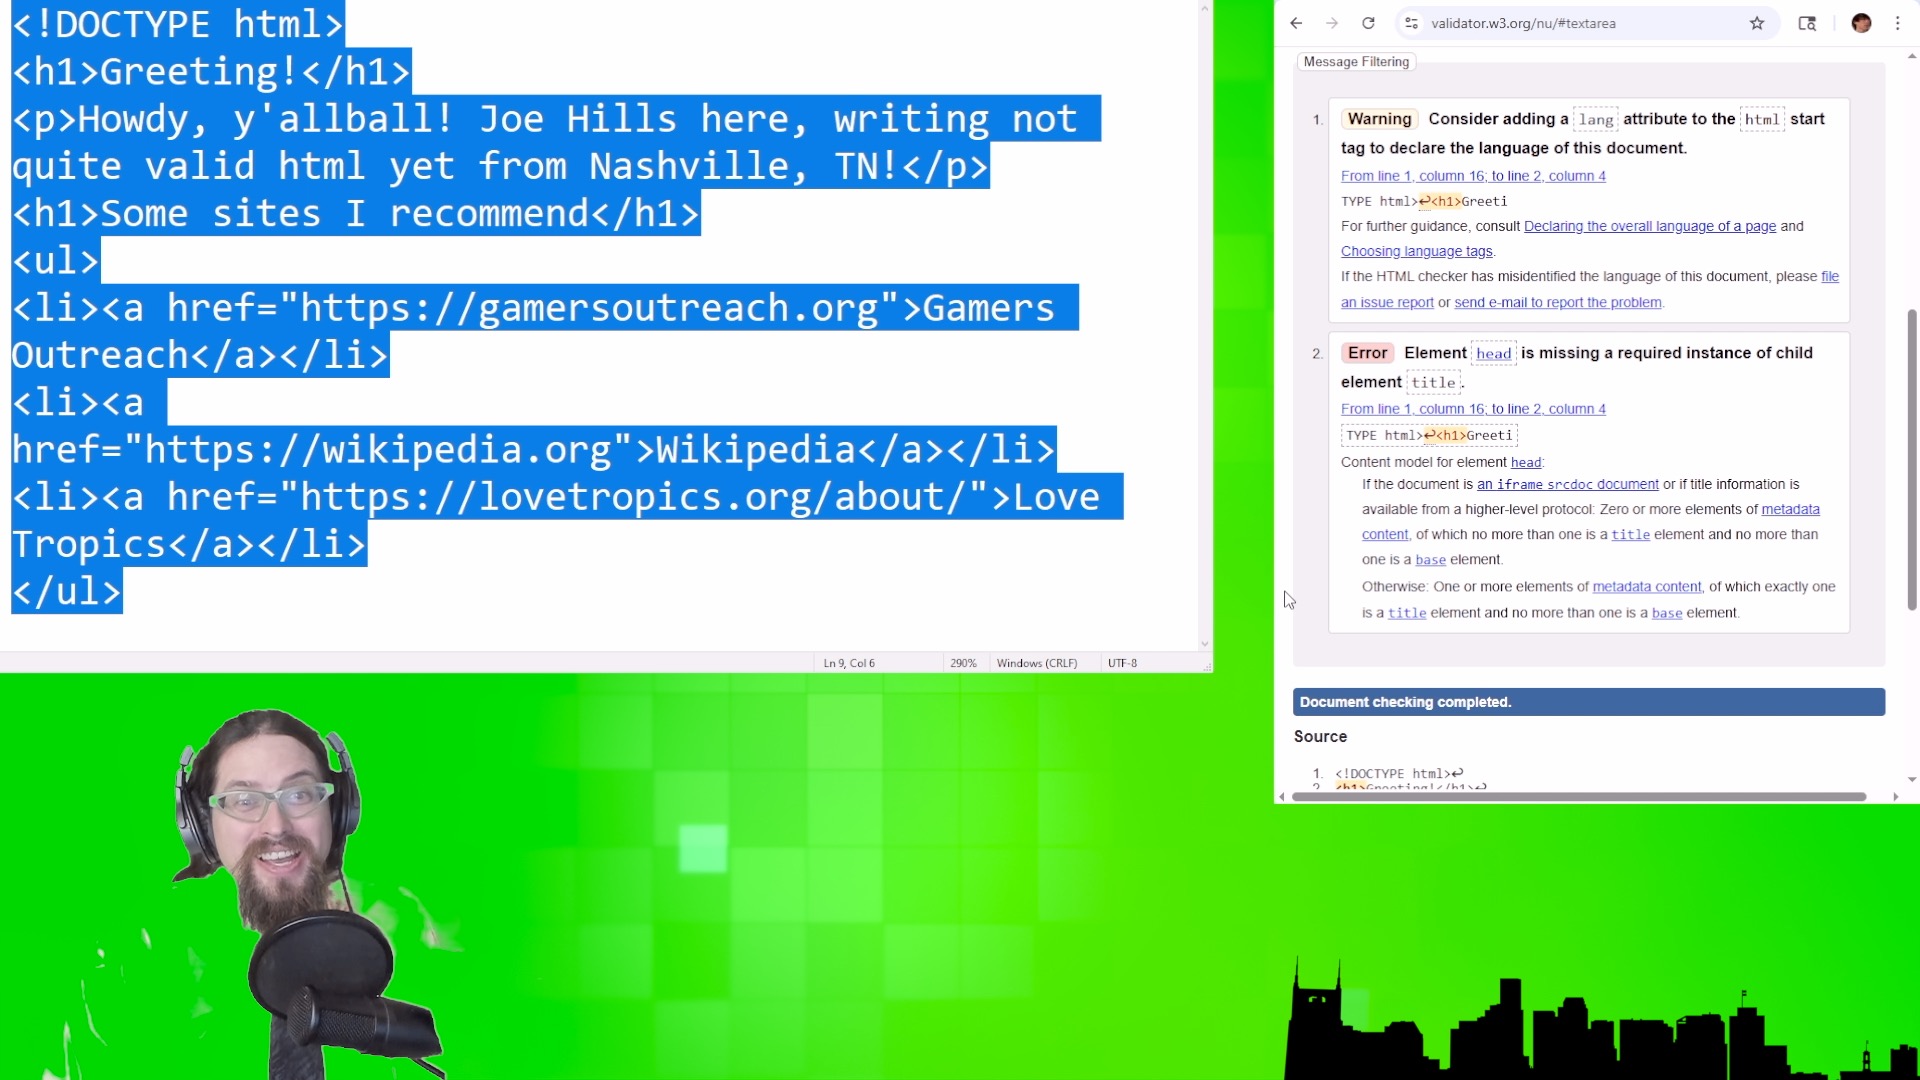
What we’ve got won’t yet meet a bunch of requirements of the HTML5 specification, we can test for what’s missing by copying our code so far into the html checker at: https://validator.w3.org/nu/#textarea

A screenshot showing the HTML validator returning errors for a missing language declaration and a missing page title.

The results of the validator may seem overwhelming, but basically it’s just informing us that we have yet to do the bare minimum to create a standards compliant HTML5 document.

Adding a title and structure

None of the tags we need to add to achieve validation are any more challenging to implement with than the anchor tag.

First, we need to add opening and closing <html> tags around our code, starting after the document type declaration, and closing at the bottom of the file. This won’t be fully standards compliant until we add a lang=”en” language attribute, assuming you’re making your site in English. Otherwise, you can look up and add your own language’s code there.

Next, we need to add a title to the web page that will show up in your browser’s title bar or tab list. Since that title is information about your web page, rather than presented inside of your web page, it will go in a special html block right after the opening <html> tag called the <head>. Everything below the closing </head> tag we need to wrap in a pair of <body> tags, like this:

<html lang="en">
<head>
<title>Please, Mister Web Page is my father, call me Ishmael</title>
</head>
<body>
Everything else we've done so far
</body>
</html>

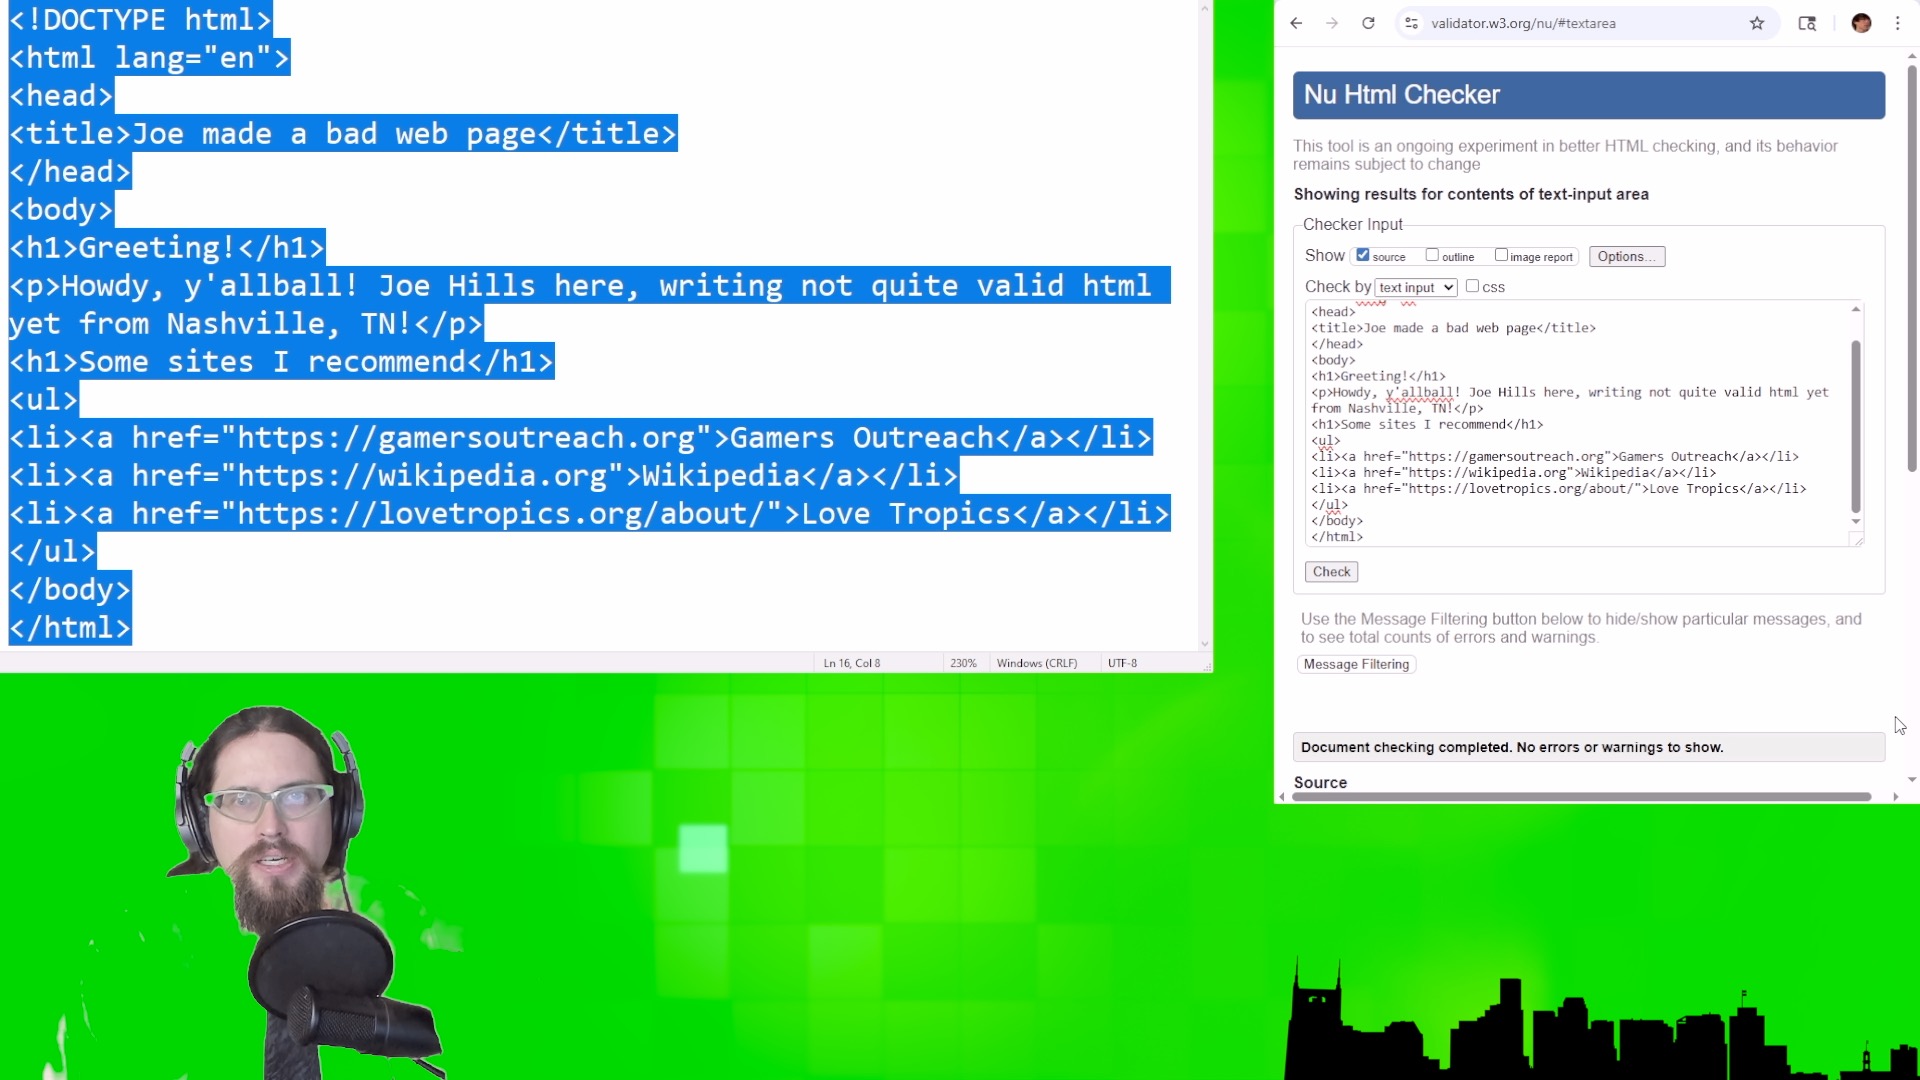
Now, if we copy and paste everything we have into the HTML validator, we get a nice happy response!

A screenshot of the updated code returning no validator errors.

Once more, with colors!

You may have noticed by now that your web page isn’t very colorful or visually distinct yet. Every browser has a default set of styles for html elements, and, yup, you’re looking at them now. Let’s quickly learn the fundamentals of how to  override those defaults with something prettier!

Earlier, we learned the <head> block at the top of the file includes information about your page, and our next tag <style>, will allow us to include CSS styling instructions for the rest of our document.

Since our document has <h1>, <p>, and <li> tags, let’s try adding a splash of color to each by creating a “CSS selector” for each tag followed by a pair of curly braces that will contain “declarations” of how we’d like each to appear.

There are CSS declarations for every imaginable way you could present your work, from font-size to text-align, from background-color to border. The Mozilla Developer Network has great documentation on using each one, so I’ll leave it as an exercise for you to decide how you’d like to customize your first web page.


<style>
h1 {color: #550000;}
p {color: #005500;}
li {color: #000055;}
</style>

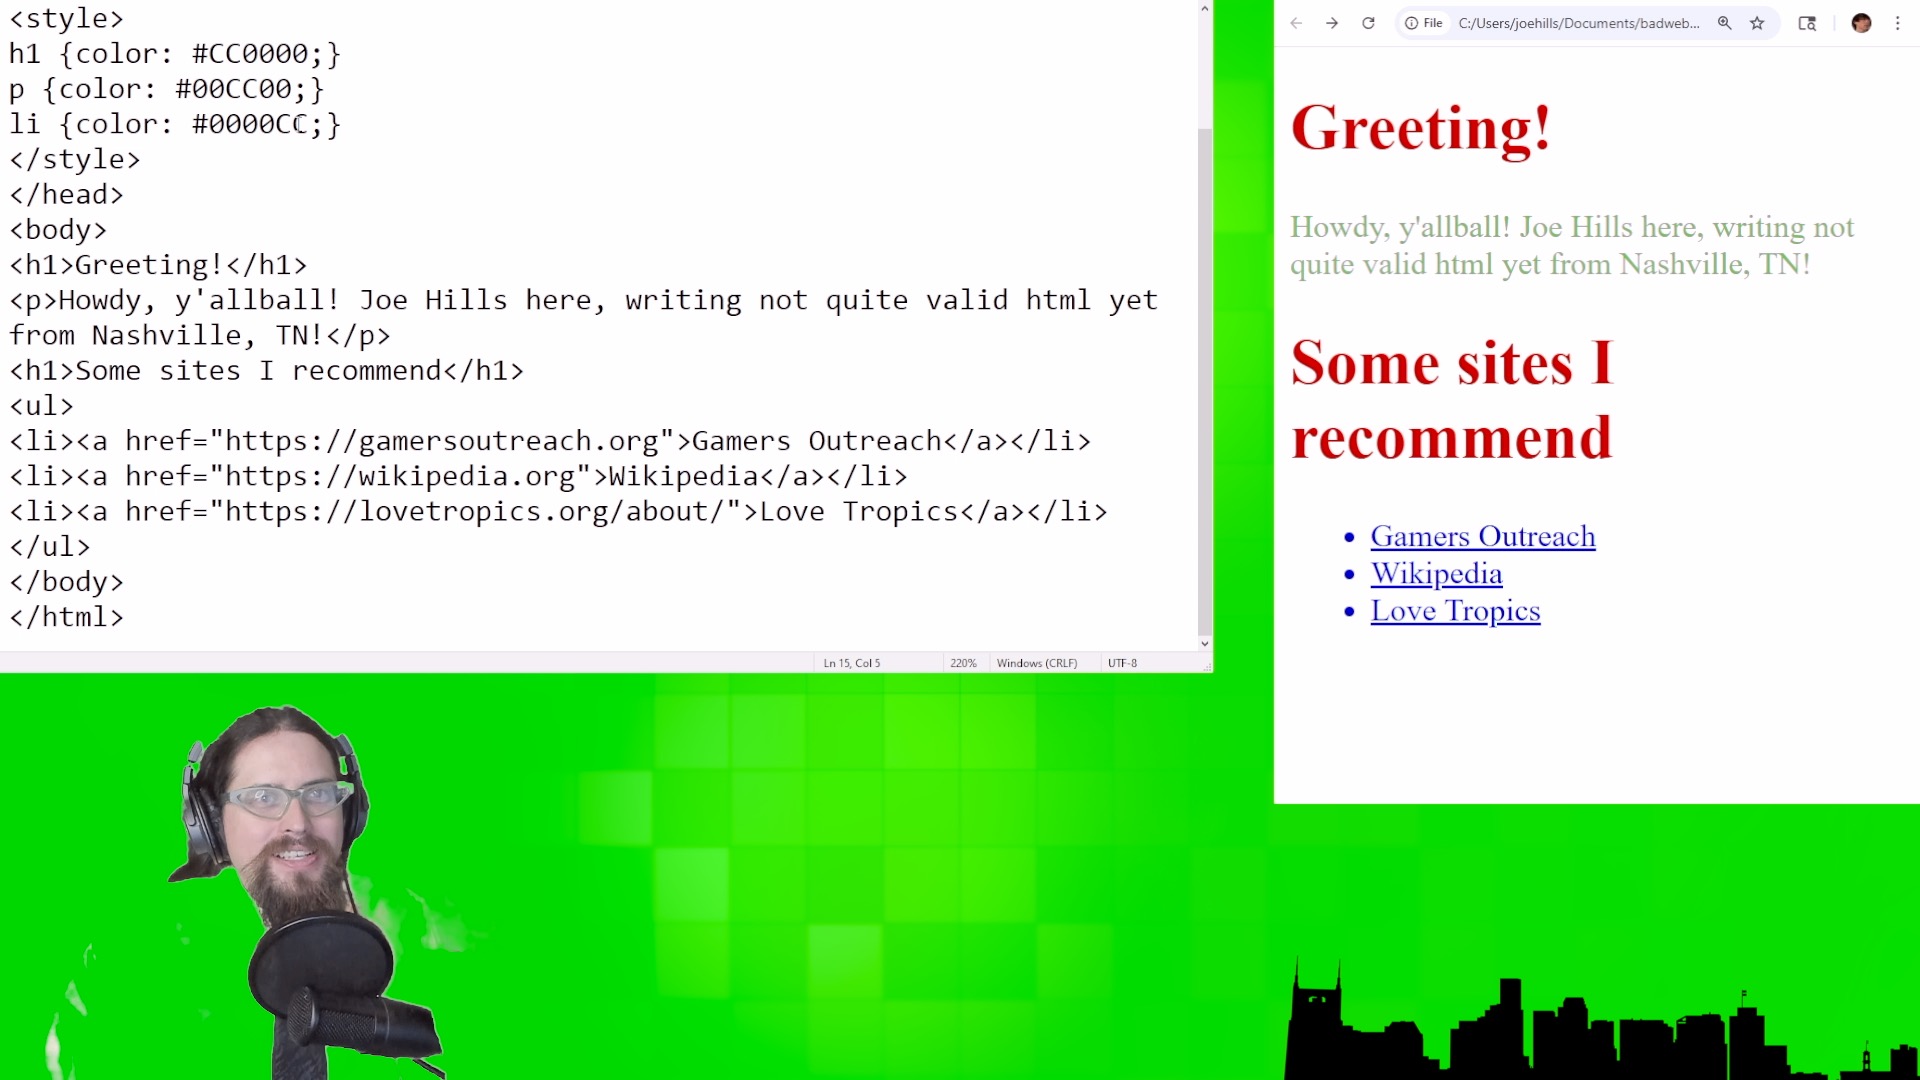
Well, that certainly is colorful at least!

A screenshot showing how the CSS styles change the color of the result.

All you need to do now is add a CSS selector for the <a> tag and you can color your links any way you like too!

That wasn’t so hard, was it?

Conclusion

This is just the beginning of your web-publishing journey! There’s a lot more to learn about HTML and CSS, and a ton of highly-specific tutorials about their intricacies. I hope you take the time to indulge your curiosity and explore the parts that are most interesting to you!

Since this course is focused on helping you get started in each broader area of practice, we’ll be moving on next to self-publishing in Lesson Two.

However, if our start today has already got you excited about hosting your own web site, I recommend you consider my sponsor NameHero using my affiliate link at https://www.namehero.com/joe and considering the Turbo Cloud plan, since it also includes a domain name with purchase. We’ll get into publishing your page and allowing folks to access it via your domain name next time, though, so there’s no rush!

Thanks so much for taking the time learn something new with me! Until next time, y’all, this is Joe Hills from Nashville, Tennessee. Keep adventuring!